How to Fix a Bottleneck in Your PC (Complete Guide)
You’re staring at a game that should be running smoothly, but the FPS counter keeps dipping, the frame times are inconsistent, and something in the back of your mind says “this shouldn’t be happening on my rig.” That’s the moment most PC gamers first hear the word bottleneck.
A bottleneck happens when one part of your PC can’t keep up with the rest. Picture a four-lane highway that suddenly narrows to one lane — traffic doesn’t stop, but it slows to the speed of the narrowest point. In a PC, that “narrow lane” is usually your CPU or GPU, though RAM, storage, drivers, and even your Windows settings can all play a part.
When a bottleneck is severe, you’ll notice it as:
- Lower FPS than your hardware should be capable of
- Stuttering or inconsistent frame times, even when average FPS looks fine
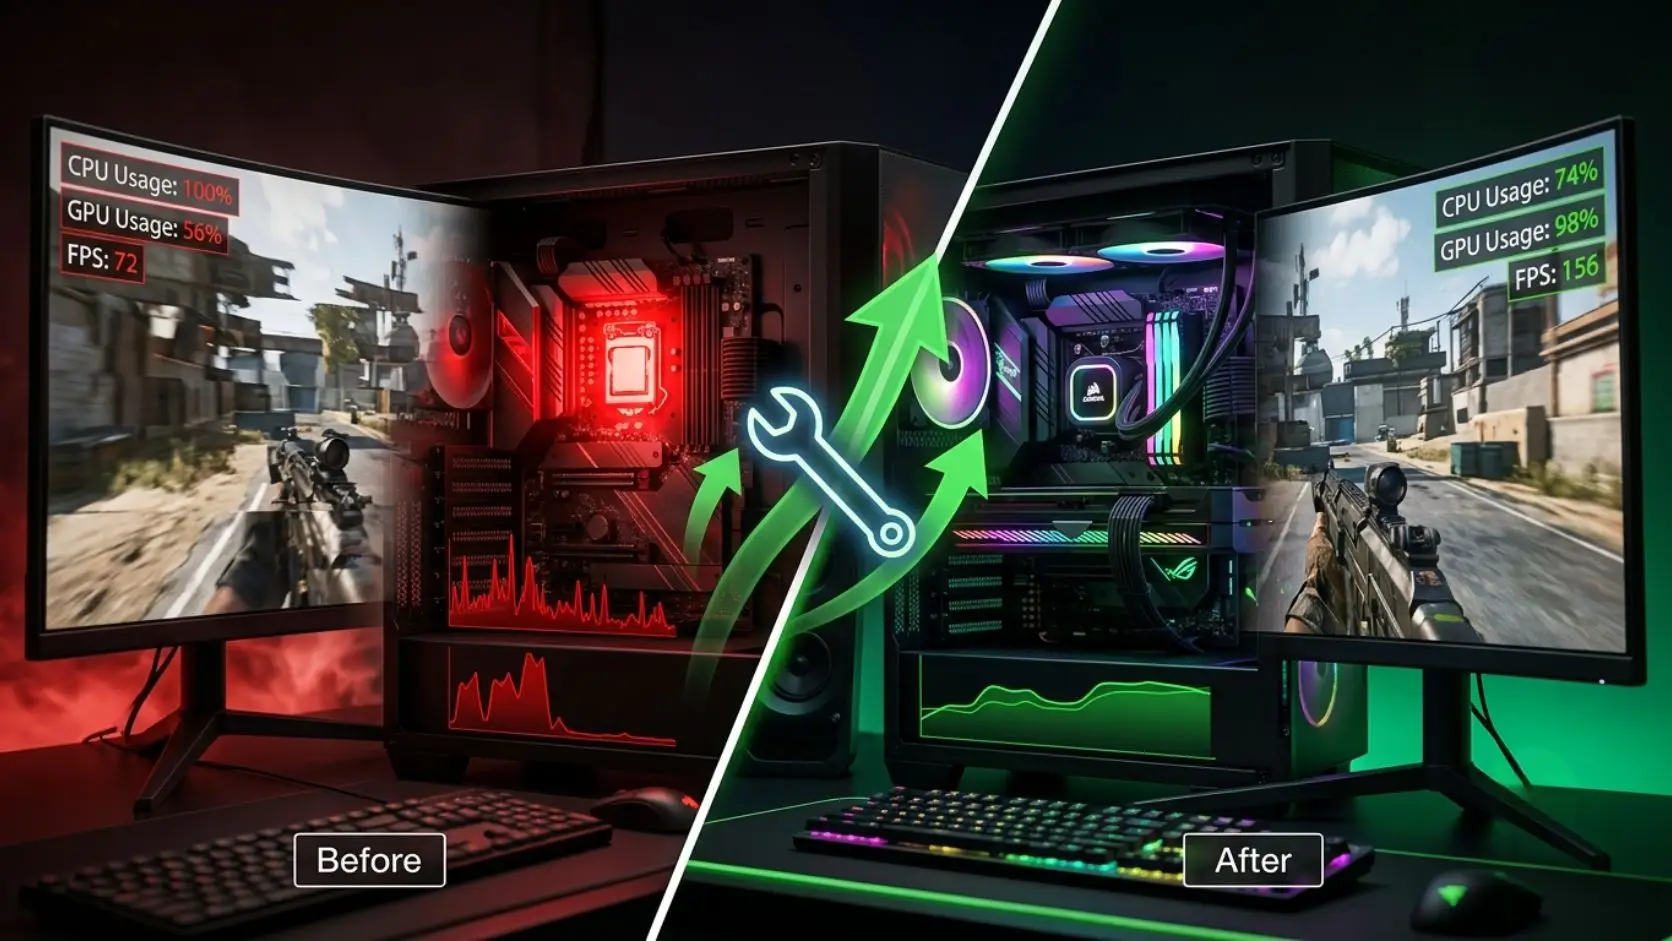
- One component (like your GPU) sitting at low usage while another (like your CPU) is maxed out
- Games that feel “choppy” despite a high FPS counter
Here’s the part most articles don’t tell you: you almost never need to buy new hardware to fix a bottleneck. A huge percentage of bottleneck complaints come from background software eating CPU cycles, outdated drivers, disabled XMP/EXPO profiles, power plans stuck on “Balanced,” or graphics settings that are mismatched to the hardware. Fix those first, and you’ll often recover 10–30% of your lost performance for free.
In this guide, you’ll learn how to:
- Diagnose exactly which component is bottlenecking your system
- Fix CPU bottlenecks using free software and setting changes
- Fix GPU bottlenecks using upscaling, driver management, and settings tuning
- Apply a full no-cost optimization checklist
- Know exactly when it’s finally time to upgrade
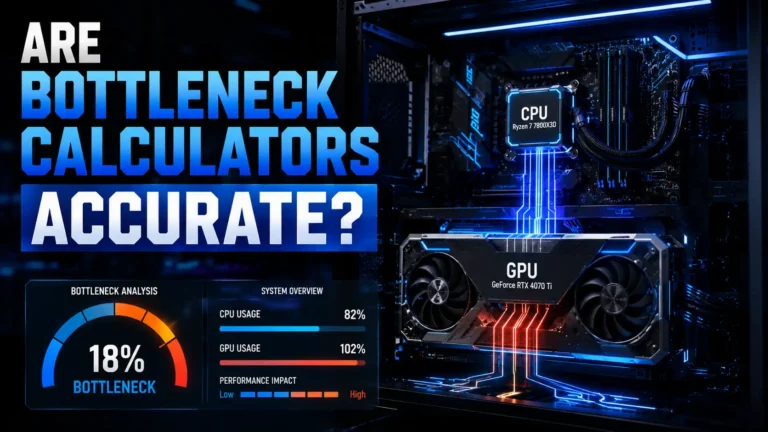
If you haven’t already, run your specs through our free Bottleneck Calculator first — it’ll tell you which component is the likely limiter and roughly by how much, so you know exactly which fixes below to prioritize instead of guessing.
Let’s start by understanding what actually causes a bottleneck in the first place.
What Causes a PC Bottleneck?
Every PC has some degree of bottleneck — that’s not a flaw, it’s just how computers work. There’s always one component that finishes its job before the others. The real question isn’t “do I have a bottleneck,” it’s “is my bottleneck severe enough to hurt my experience?”
A mild bottleneck (5–10%) is normal and invisible in practice. A severe bottleneck (25%+) is what causes noticeable stutter, low FPS, or wasted potential from expensive hardware.
Common causes include:
CPU — Handles game logic, AI, physics, draw calls, and NPC behavior. When it can’t keep up, your GPU sits idle waiting for instructions.
GPU — Renders the actual image. When it’s the limiting factor, GPU usage sits near 100% while CPU usage looks comparatively low.
RAM — Insufficient capacity or single-channel/slow RAM can starve both CPU and GPU of data, especially in CPU-heavy or open-world games.
Storage — Slow HDDs or even SATA SSDs can cause texture pop-in and stutter, especially in games with aggressive asset streaming.
Drivers — Outdated GPU or chipset drivers can silently cost you 5–15% performance, or introduce stutter that looks like a hardware bottleneck.
BIOS — Older BIOS versions may lack memory compatibility, power management fixes, or CPU microcode updates that affect performance.
Background software — Overlays, browsers, launchers, and RGB software quietly consume CPU cycles and RAM that your game needs.
Windows settings — Power plans, background app permissions, and indexing services can all throttle performance without you realizing it.
Heat — Thermal throttling reduces clock speeds automatically to protect your components, creating a “bottleneck” that’s really just overheating.
Power limits — Laptops and some desktops cap power delivery to the CPU/GPU, artificially limiting performance regardless of cooling.
The goal of this guide is to walk through each of these systematically, starting with how to actually diagnose which one is affecting you.
Step 1: Identify What’s Causing the Bottleneck
Before fixing anything, you need data. Guessing wastes time and can lead you to “fix” the wrong component. Here are the tools professionals actually use:
MSI Afterburner — Free GPU monitoring and overclocking tool. Even if you don’t own an MSI card, it works with virtually any GPU. Use it to track GPU usage, GPU temperature, clock speed, and power draw in real time.
RivaTuner Statistics Server (RTSS) — Bundled with Afterburner. This is what actually draws the on-screen overlay showing FPS and frame time graphs while you game.
HWiNFO — The most detailed sensor monitoring tool available. Tracks CPU usage per core, CPU temperature, VRAM usage, RAM usage, clock speeds, and power limits simultaneously.
Windows Task Manager — The quickest built-in option. Open the Performance tab to see overall CPU, GPU, memory, and disk utilization at a glance.
How to Read the Numbers
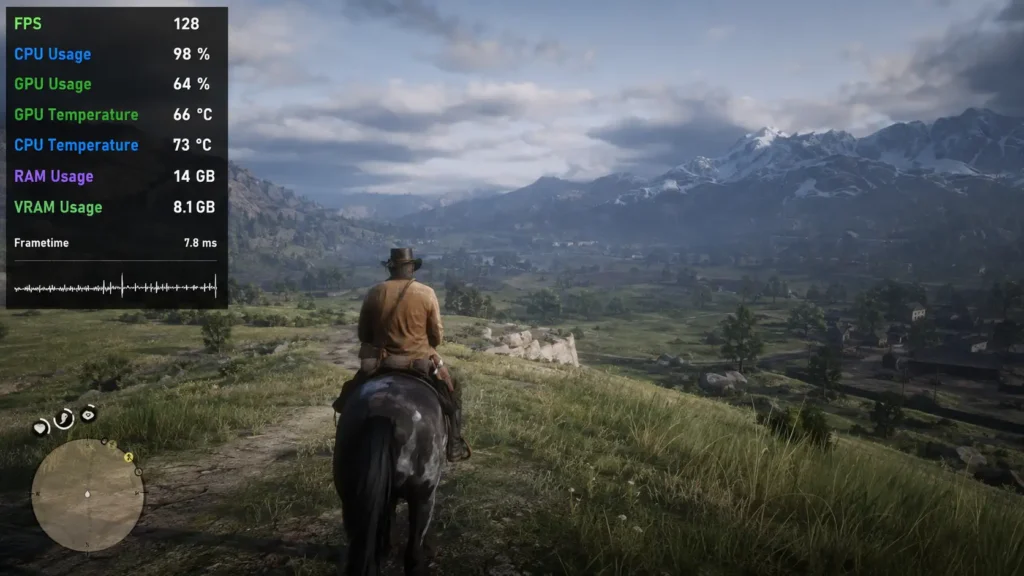
The key isn’t just looking at one number — it’s comparing CPU usage to GPU usage while gaming.
| CPU Usage | GPU Usage | Likely Meaning |
|---|---|---|
| High (85–100%) | Low (50–80%) | CPU bottleneck — GPU is waiting on the CPU |
| Low (40–70%) | High (95–100%) | GPU bottleneck — this is actually normal and healthy |
| High (85–100%) | High (95–100%) | Balanced system, near max potential |
| Low | Low | Something else is limiting FPS (frame cap, VSync, background issue, or CPU single-core limit) |
| Normal | Normal, but stuttering | Possible RAM, VRAM, or storage bottleneck |
| Fluctuating wildly | Fluctuating wildly | Background software interference or thermal throttling |
A few extra signals worth understanding:
- Frame times matter more than average FPS. Consistent frame times (low variance) feel smooth even at a lower FPS. Spiky frame times feel like stutter even at a high average FPS.
- VRAM usage near or at your GPU’s maximum often causes stutter that looks like a GPU bottleneck but is actually a memory capacity issue.
- Clock speeds dropping unexpectedly during gameplay usually point to thermal throttling or a power limit being hit.
- Temperatures above roughly 85°C on CPU or 83°C on GPU under sustained load are a strong sign cooling needs attention.
Once you know which component is maxed out, you can jump to the right fix section below. <!– PRO TIP CALLOUT –>
Pro Tip: A GPU sitting at 99% usage is usually a good sign, not a problem — it means you’re getting full value from your graphics card. The real issue is when your GPU usage is noticeably lower than your CPU usage.
If you’d rather skip the manual monitoring step, our Bottleneck Calculator gives you a benchmark-informed estimate of the same thing in under two seconds — useful for a quick sanity check before you dig into Afterburner or HWiNFO, though live monitoring on your own system is still the more accurate final word.
How to Fix a CPU Bottleneck
A CPU bottleneck means your processor can’t feed instructions to your GPU fast enough. Here’s how to fix it, roughly ordered from easiest to most involved.
Close Background Applications
Every open program competing for CPU time takes cycles away from your game. The worst offenders:
- Discord overlays — the in-game overlay specifically, more than Discord itself
- Chrome tabs — each tab is essentially its own mini-process; ten tabs can add up to real CPU and RAM usage
- Game launchers — Steam, Epic, Battle.net, and Ubisoft Connect all run background services; multiple launchers open at once compounds this
- RGB software — iCUE, Aura Sync, and similar tools poll hardware constantly and are notorious for CPU overhead
- Recording software — OBS or GeForce Experience’s instant replay buffer uses CPU (and sometimes GPU) encoding resources even when idle
- Windows updates — background downloads and installs can spike CPU and disk usage unpredictably
Background tasks don’t just take raw CPU cycles — they also compete for CPU cache space, which can slow down your game’s own threads even when usage numbers look moderate. Close what you don’t need before you launch anything competitive or demanding.
Enable High Performance Power Mode
Windows’ default “Balanced” power plan intentionally throttles CPU clock speeds to save energy, and it’s more aggressive than most people realize.
- Balanced ramps clocks up and down dynamically, which can introduce micro-stutter as the CPU responds to load changes.
- High Performance keeps clocks consistently higher, trading a bit of power efficiency for steadier performance.
- Ultimate Performance (available on some Windows versions) removes even more power-saving throttling — worth enabling if you see it in Power Options.
- On laptops, also check that Windows isn’t silently running in a battery-saving mode, and that your manufacturer’s own power/performance utility (like Lenovo Vantage or ASUS Armoury Crate) is set to “Performance” or “Turbo,” not “Silent” or “Balanced.”
Expect a modest but real improvement — typically 2–8% in CPU-bound scenarios, and noticeably smoother frame pacing.
Update BIOS
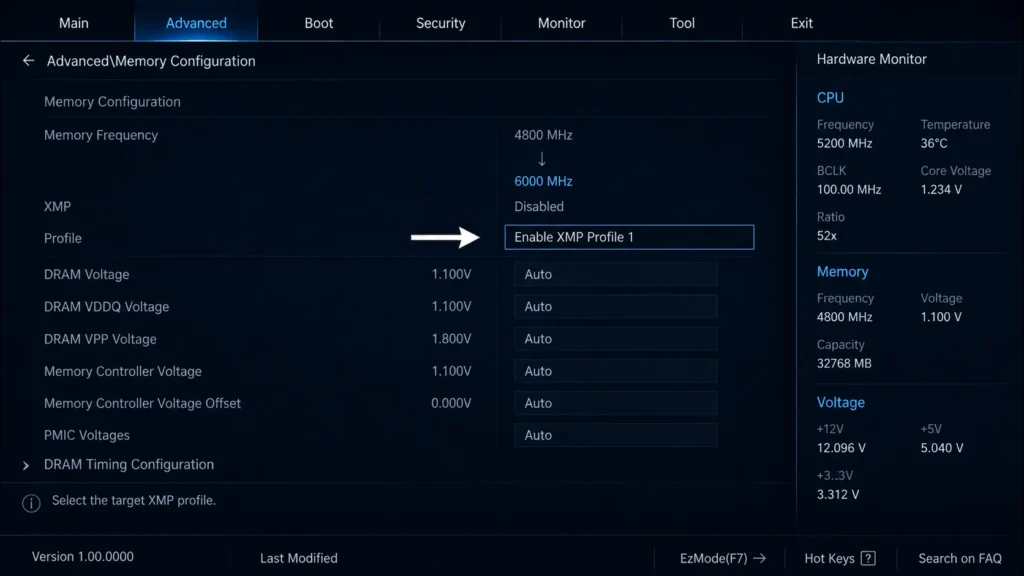
BIOS updates aren’t just about adding new CPU support. They frequently include:
- Improved memory compatibility (helping XMP/EXPO profiles run stable at rated speeds)
- CPU microcode updates that can affect both performance and security
- Power delivery and voltage curve improvements
- Fixes for boot instability and inconsistent clock behavior
Precautions before updating: Never let a BIOS update lose power mid-flash — use a UPS if your area has unstable power. Check your current version against the changelog before updating; if you’re already on a stable version with no relevant fixes listed, there’s no urgency. Back up your existing BIOS settings (or note them down) since updates sometimes reset them to default.
A BIOS update is worthwhile when you’re seeing memory instability, when your motherboard manufacturer explicitly lists performance or compatibility fixes, or when you’ve just installed a new CPU that needs a specific BIOS version to be recognized correctly.
Install the Latest Chipset Drivers
Chipset drivers manage communication between your CPU, RAM, storage, and other components — they’re separate from your GPU drivers and are easy to forget.
- AMD chipset drivers are available directly from AMD’s website and are essential for Ryzen platforms, particularly for stable XMP/EXPO memory speeds and proper CPU core parking behavior.
- Intel chipset drivers perform a similar role, ensuring proper communication between the CPU, memory controller, and storage.
Outdated chipset drivers can cause inconsistent memory timings, incorrect power state switching, and even random stutter that has nothing to do with your GPU. If you built your PC more than a year ago and never checked, this is worth five minutes of your time.
Enable XMP or EXPO
By default, most RAM runs at a conservative “safe” speed set by the JEDEC standard — often far below what you paid for.
- XMP (Intel Extreme Memory Profile) and EXPO (AMD’s equivalent) are one-click BIOS settings that unlock your RAM’s rated speed.
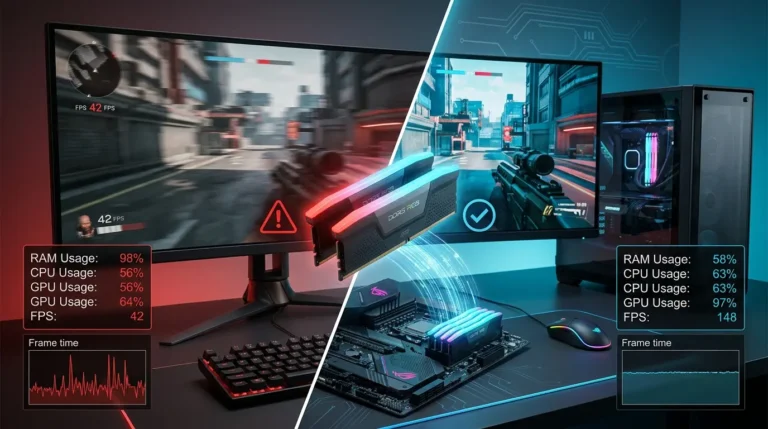
- Single-channel vs. dual-channel matters enormously — running RAM in single-channel mode (one stick, or two sticks in the wrong slots) can cost 10–20% performance in CPU-bound games, far more than most people expect.
- RAM frequency directly affects CPU-bound titles because the CPU relies on fast memory access to prepare frames quickly. In games like Cyberpunk 2077 or Microsoft Flight Simulator, going from stock JEDEC speeds to a properly enabled XMP/EXPO profile can be one of the single biggest free performance gains available.
Warning: Always confirm your RAM is installed in the correct dual-channel slots (usually A2/B2, check your motherboard manual) before assuming XMP alone will fix things. Single-channel RAM with XMP enabled is still a bottleneck.
Reduce CPU-Heavy Graphics Settings
Not all graphics settings hit your GPU — some are almost entirely CPU-driven:
- View Distance — how far the game renders objects and terrain
- Shadow Distance — shadow calculations scale with both CPU and GPU, but distance specifically taxes CPU-side culling
- Object Distance — how many objects are loaded and tracked at once
- NPC Density — more NPCs means more AI calculations per frame
- AI Population — directly tied to CPU-side logic processing
- Simulation Quality — physics and world simulation systems run on CPU threads
- Physics — ragdoll, destruction, and cloth simulation are CPU-intensive
- Crowd Density — similar to NPC density, common in open-world and racing games
- Terrain Detail — procedural terrain generation and LOD calculations
| Setting | Primarily Stresses | Notes |
|---|---|---|
| View Distance | CPU | Reduce first if CPU-bound |
| Shadow Distance | CPU + GPU | Distance = CPU, resolution/quality = GPU |
| NPC/Crowd Density | CPU | Big FPS gains in open-world titles |
| AI Population | CPU | Common in strategy and simulation games |
| Simulation/Physics Quality | CPU | Reduce for CPU-bound stutter |
| Terrain Detail | CPU + GPU | Mixed, test individually |
| Object Draw Distance | CPU | Especially in open-world games |
Lower Background CPU Usage
Beyond apps you can see, Windows runs plenty you can’t:
- Startup apps — check Task Manager’s Startup tab and disable anything non-essential
- Scheduled tasks — some software (printers, cloud sync tools, update checkers) run scheduled background scans
- Antivirus scans — schedule full scans for times you’re not gaming, and consider adding your game folders to exclusions (only for trusted, legitimate game files)
- Browser tabs — each tab with autoplaying content or ads can spike CPU usage unexpectedly
- Windows indexing — the Search Indexer can spike disk and CPU usage; excluding game drives from indexing helps on some systems
Improve Cooling
Thermal throttling happens when your CPU exceeds its safe temperature and automatically reduces clock speed to cool down — this looks exactly like a bottleneck because, functionally, it is one.
- Dust buildup inside the case, on the CPU cooler, and in fan filters is the single most common and most overlooked cause of thermal throttling. A can of compressed air every few months makes a real difference.
- Airflow — make sure your case has clear intake and exhaust paths; a case packed with cables blocking airflow can raise temperatures by several degrees.
- CPU cooler upgrades — if you’re on a stock cooler and hitting throttling temperatures under load, a mid-range aftermarket air cooler is often a bigger performance unlock than people expect.
- Reapplying thermal paste — paste dries out over 2–4 years and loses effectiveness; if your CPU is running hotter than it used to with no other changes, this is a likely cause.
Mild CPU Overclocking
For CPUs that support it, a modest overclock can meaningfully close a CPU bottleneck.
- Benefits — higher sustained clock speeds directly reduce CPU-bound frame time spikes.
- Risks — instability, crashes, and (in extreme, poorly-managed cases) reduced component lifespan from excessive voltage.
- Voltage — small clock speed gains rarely need large voltage increases; chasing the last 2–3% of clock speed with high voltage is rarely worth the added heat.
- Stability testing — always run a stress test (like Cinebench R23 in loop mode or OCCT) for at least 30 minutes after any overclock before trusting it in games.
Not every CPU supports overclocking — Intel’s non-“K” CPUs and most locked AMD non-X chips have little to no overclocking headroom. Check your specific model before spending time here.
How to Fix a GPU Bottleneck
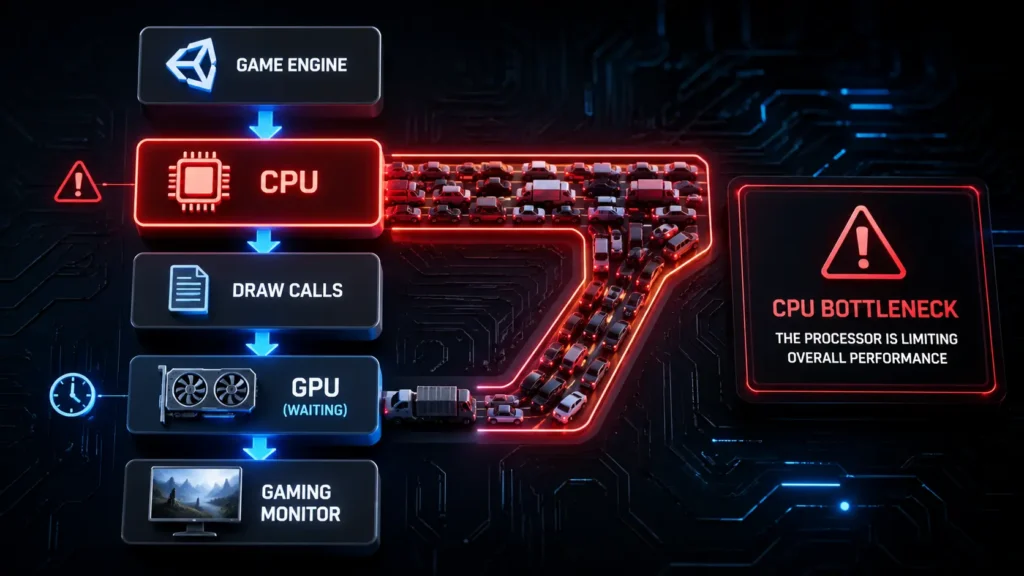
A GPU bottleneck means your graphics card can’t render frames fast enough to keep up with your CPU. Usually this shows up as GPU usage near 100% with lower CPU usage — which, as mentioned earlier, is often completely normal. Here’s how to address it when it’s limiting you more than you’d like.
Lower Graphics Settings
Not all settings cost the same amount of performance. Here they are ranked roughly by typical GPU impact, heaviest first:
| Setting | GPU Impact | Notes |
|---|---|---|
| Ray Tracing | Very High | Often 20–40%+ FPS cost; biggest single toggle |
| Global Illumination | Very High | Especially expensive when ray-traced |
| Volumetric Lighting | High | Fog, god rays, atmospheric effects |
| Screen Space Reflections | High | Can often be replaced with cheaper reflection methods |
| Reflections (general) | High | Especially at high resolutions |
| Hair Quality | Medium-High | Strand-based hair rendering is surprisingly costly |
| Ambient Occlusion | Medium | Diminishing returns above “Medium” in most games |
| Texture Quality | Medium (mostly VRAM) | Costs VRAM more than raw GPU compute — see below |
| Anti-Aliasing | Medium | TAA is relatively cheap; MSAA is expensive |
| Effects Quality | Medium | Particles, explosions, smoke |
Enable DLSS, FSR, or XeSS
Upscaling technology is the single most impactful free GPU performance gain available today.
- How it works — the game renders internally at a lower resolution, then an AI or spatial algorithm upscales the image to your target resolution, recovering most of the visual quality while rendering far fewer pixels.
- Performance vs. image quality — “Quality” mode typically renders at around 67% of target resolution per axis and looks nearly identical to native in motion; “Performance” and “Ultra Performance” modes render at lower internal resolutions for bigger FPS gains with more visible quality tradeoffs.
- Best quality presets — for most GPU-bound situations, DLSS/FSR/XeSS “Quality” mode is the sweet spot: substantial FPS gains with minimal visible quality loss, especially at 1440p and 4K.
- When not to use them — at 1080p, “Performance” and “Ultra Performance” modes can look noticeably soft since there’s less native resolution to upscale from; stick to “Quality” or “Balanced” at lower resolutions.
Pro Tip: If your GPU supports it, DLSS/FSR Frame Generation can further boost perceived smoothness, but it doesn’t reduce input latency the way a true FPS increase does — it’s best used when you’re already comfortably above your monitor’s refresh rate floor.
Update GPU Drivers
- Clean driver installation — using DDU (Display Driver Uninstaller) in Safe Mode before installing a new driver removes leftover settings and files that can cause instability, especially after switching between AMD and NVIDIA cards.
- Driver rollback — if a new driver introduces stutter or crashes in a specific game, rolling back to a previous stable version (through NVIDIA’s or AMD’s driver archive) is a completely valid fix while you wait for a patch.
- When newer drivers help — “Game Ready” or “Game Optimized” drivers released alongside major titles often include specific performance optimizations for that game; check the release notes before assuming all driver updates are equal.
Reduce Resolution
Resolution has one of the largest direct impacts on GPU load, since every pixel needs to be rendered.
- 1080p — least demanding, best for high refresh rate competitive play
- 1440p — a common sweet spot between visual fidelity and performance
- 4K — the most GPU-demanding by a wide margin; roughly 2.25x the pixels of 1440p
- Dynamic Resolution — automatically lowers internal render resolution during demanding scenes to maintain a target frame rate, then raises it back during lighter scenes
- Resolution Scaling — a manual version of the same concept, letting you render below your display’s native resolution while still outputting at full resolution
Check VRAM Usage
When a GPU runs out of video memory (VRAM), performance doesn’t just gradually decline — it often falls off a cliff.
- What happens when VRAM runs out — the game is forced to swap data between VRAM and system RAM (or even storage), which is dramatically slower and causes severe stuttering.
- Texture streaming — modern games stream textures in and out of VRAM dynamically; insufficient VRAM causes visible texture pop-in or blurry textures that suddenly sharpen a moment later.
- Stuttering — if you see frame time spikes correlating with VRAM usage hitting your card’s maximum in HWiNFO or Afterburner, lowering texture quality (not resolution) is usually the most effective single fix.
Improve GPU Cooling
- GPU hotspot — the hotspot temperature (measurable in HWiNFO) often runs 10–20°C higher than the general GPU temperature reading; a large gap between the two can indicate degraded thermal paste or pads.
- Fan curves — default fan curves are often tuned conservatively for noise; a custom, more aggressive curve in Afterburner can meaningfully reduce thermal throttling.
- Dust cleaning — GPU fans and heatsinks accumulate dust just like CPU coolers and directly raise operating temperatures over time.
- Case airflow — a GPU that’s cooking inside a poorly ventilated case will throttle regardless of how good the cooler itself is.
Mild GPU Overclocking
- Core clock — a small, stable core clock offset (often achieved through automated tools like NVIDIA’s OC Scanner or AMD’s auto-tuning) can add a few percent of performance.
- Memory clock — GPU memory overclocks are often more impactful than core overclocks in memory-bandwidth-sensitive games.
- Power limits — raising the power limit slider gives the GPU more headroom to sustain boost clocks under load, often with a bigger real-world impact than the core clock offset itself.
- Stability testing — always validate with a stress test (like 3DMark or an extended benchmark loop) and watch for artifacts, crashes, or driver timeouts before trusting an overclock long-term.
Fix a Bottleneck Without Upgrading Hardware
Here’s the complete checklist, with a realistic sense of how much each item tends to help. Individually, most of these are small. Combined, they routinely add up to a meaningfully smoother, faster experience.
✓ Close unnecessary apps — Small to moderate gain; bigger if you’re running many overlays or a browser with dozens of tabs
✓ Enable XMP/EXPO — Moderate to large gain in CPU-bound and open-world games
✓ High Performance power mode — Small gain, smoother frame pacing
✓ Update Windows — Small gain, occasionally fixes specific performance bugs
✓ Update BIOS — Small to moderate gain, mainly stability and memory compatibility
✓ Update chipset drivers — Small to moderate gain, especially on AMD platforms
✓ Update GPU drivers — Small to moderate gain, occasionally large for specific new titles
✓ Clean PC (dust removal) — Small to large gain if thermal throttling was occurring
✓ Improve airflow — Small to moderate gain, mainly sustained performance under load
✓ Enable DLSS/FSR/XeSS — Large gain, often the single biggest free fix available
✓ Lower CPU-heavy settings — Moderate to large gain in CPU-bound scenarios
✓ Lower GPU-heavy settings — Large gain, especially disabling ray tracing
✓ Disable unnecessary overlays — Small gain, occasionally moderate
✓ Optimize startup programs — Small gain, mostly affects background CPU/RAM load
✓ Reduce browser usage while gaming — Small to moderate gain
✓ Verify game files — No FPS gain directly, but fixes corruption-related stutter
✓ Install games on SSD — Moderate gain for load times and texture streaming stutter
✓ Enable Game Mode — Small gain, prioritizes game process resources
✓ Disable unnecessary recording features — Small to moderate gain, especially with instant replay buffers active
Best Graphics Settings to Reduce CPU Bottlenecks
| Setting | CPU Impact | Recommendation |
|---|---|---|
| View Distance | High | Lower to Medium/High; avoid Ultra unless CPU headroom exists |
| Shadow Distance | High | Reduce distance specifically, not just shadow resolution |
| NPC Density | High | Lower in crowded open-world or city-based games |
| AI Population | High | Reduce in simulation/strategy titles for large gains |
| Simulation Quality | High | Lower unless the simulation systems are core to gameplay |
| Physics | Medium-High | Reduce if not gameplay-critical |
| Terrain Detail | Medium | Test individually; impact varies by engine |
| Crowd Density | Medium-High | Especially impactful in racing and sports games |
Best Graphics Settings to Reduce GPU Bottlenecks
| Setting | GPU Impact | Recommendation |
|---|---|---|
| Texture Quality | Medium (VRAM-heavy) | Keep high if VRAM allows; lower first if stuttering |
| Ray Tracing | Very High | Disable first for the biggest FPS recovery |
| Volumetrics | High | Lower for fog/atmosphere-heavy scenes |
| Ambient Occlusion | Medium | Medium setting usually looks nearly as good as Ultra |
| Global Illumination | Very High | Reduce or disable ray-traced GI first |
| Reflections | High | Lower screen-space or ray-traced reflection quality |
| Shadows | Medium | Reduce resolution/quality, not just distance |
| Anti-Aliasing | Medium | Switch to TAA/DLAA over MSAA for efficiency |
| Post Processing | Low-Medium | Minor gains, low visual cost to reduce |
| Effects | Medium | Reduce particle density in effects-heavy scenes |
Real Gaming Examples
Counter-Strike 2 — Extremely CPU-sensitive at high refresh rates. Lowering shadow quality and disabling unnecessary background overlays matters more here than lowering texture settings, since most competitive players are CPU-bound trying to hit 240+ FPS.
Valorant — Similarly CPU-bound at high frame rates; low GPU settings are already the competitive standard, so the biggest gains come from background app cleanup and high-refresh-rate-friendly power settings.
Fortnite — A mix of both, but view distance and effects quality (especially in build-heavy fights) hit CPU hard, while shadows and post-processing hit GPU.
Cyberpunk 2077 — Heavily GPU-bound with ray tracing enabled; disabling ray tracing and enabling DLSS Quality mode recovers massive FPS. Crowd density affects CPU load in dense city areas.
Starfield — CPU-bound in cities and space stations due to NPC and simulation density; GPU-bound in open exploration with volumetric effects and shadows enabled.
Microsoft Flight Simulator — One of the most CPU-demanding games available due to simulation complexity; XMP/EXPO and fast RAM make a genuinely large difference here, alongside GPU load from volumetric clouds and terrain detail.
GTA V — Population density and traffic settings are the primary CPU-heavy sliders; shadows and reflections are the primary GPU-heavy sliders.
Red Dead Redemption 2 — Extremely GPU-heavy with volumetric lighting, water, and grass detail; also has meaningful CPU load from wildlife and NPC AI systems in populated areas.
Common Mistakes
Buying a faster GPU with an old CPU — the new GPU simply sits underutilized, waiting on the CPU; FPS gains end up far smaller than expected.
Buying an expensive CPU with a weak GPU — the opposite problem; you’re paying for headroom the GPU can never use.
Ignoring RAM speed — running RAM at default JEDEC speeds instead of enabling XMP/EXPO leaves real performance on the table, especially in CPU-bound titles.
Ignoring temperatures — assuming a “bottleneck” is purely a hardware limitation when it’s actually thermal throttling wastes money on unnecessary upgrades.
Never updating drivers — GPU and chipset drivers directly affect performance and stability; skipping updates for years is a common, easily fixed mistake.
Running dozens of background apps — cumulative CPU and RAM overhead from overlays, launchers, and browser tabs adds up more than most people expect.
Using outdated BIOS — missing memory compatibility and power management improvements that directly affect stability and performance.
Confusing low FPS with network lag — a local hardware bottleneck (low, stuttering FPS) and network latency (high ping, rubber-banding) feel similar but have completely different causes and fixes; check your in-game FPS counter and ping separately before assuming either one.
When Should You Upgrade Hardware?
Optimization has limits. Here’s how to know when you’ve genuinely outgrown your current hardware rather than just needing a tune-up.
CPU upgrades — worth considering when your CPU usage sits at or near 100% across most cores during gameplay even after closing background apps, updating drivers, and enabling XMP, and your GPU usage remains noticeably lower than it should be for its class.
GPU upgrades — worth considering when your GPU sits at 99% usage but frame rates are still below your target even after enabling upscaling and lowering demanding settings like ray tracing.
RAM upgrades — worth considering if you’re below 16GB total for modern gaming, or if you’re seeing heavy page file usage and stuttering in memory-intensive open-world titles.
SSD upgrades — worth considering if you’re still on a mechanical hard drive; moving to even a basic SATA SSD dramatically reduces texture streaming stutter and load times. NVMe upgrades from SATA SSD offer much smaller real-world gaming gains.
Cooling upgrades — worth considering if you’re consistently seeing thermal throttling on stock cooling after cleaning dust and improving case airflow.
Realistic example: A Ryzen 5 3600 paired with an RTX 4070 will bottleneck significantly in CPU-bound titles at 1080p, since the CPU can’t feed the GPU fast enough — a CPU upgrade would help more than any Windows or driver optimization at that point. Conversely, a Core i9-14900K paired with a GTX 1660 is overwhelmingly GPU-bound in virtually every modern title — a GPU upgrade would deliver far more value than any CPU-focused tweak.
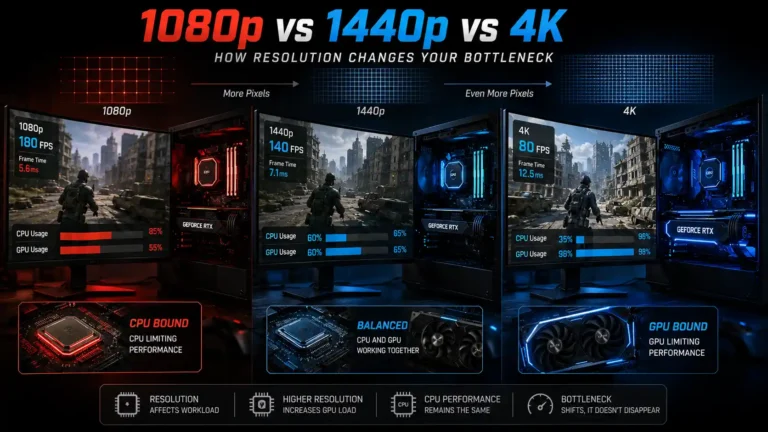
Not sure which side of that gap your own build falls on? Plug your exact CPU and GPU into the Bottleneck Calculator before you buy anything — it’ll name the specific limiting component instead of leaving you to guess, which matters since upgrading the wrong part is the single most expensive mistake builders make. If you’re weighing a resolution change alongside a hardware upgrade, it’s also worth knowing that the same hardware can post a completely different bottleneck at 1440p or 4K than it does at 1080p.
Quick Troubleshooting Checklist
A fast, under-10-minute pass to identify and reduce a bottleneck:
- Open Task Manager or HWiNFO and check CPU vs. GPU usage while gaming
- Confirm XMP/EXPO is enabled in BIOS
- Switch Windows power plan to High Performance
- Close background apps, overlays, and extra browser tabs
- Check GPU and CPU temperatures for signs of throttling
- Confirm GPU drivers are up to date
- Lower the single heaviest setting for your bottleneck type (Ray Tracing for GPU, View/Shadow Distance for CPU)
- Enable DLSS/FSR/XeSS if available
- Re-check FPS and usage numbers to confirm improvement
Frequently Asked Questions
Can you fix a bottleneck without buying new hardware?
Yes, in most cases. Driver updates, XMP/EXPO, power plan changes, background app cleanup, and graphics settings adjustments can recover a meaningful amount of lost performance without spending anything.
How much FPS can optimization improve?
It varies widely by starting point, but a combination of the fixes in this guide commonly recovers anywhere from 10% to 30%+ FPS, with larger gains coming from enabling upscaling and fixing thermal throttling if either was previously an issue.
Does closing background apps improve FPS?
Yes, though usually modestly (a few percent) unless you’re running unusually heavy background software like recording tools or numerous overlays, in which case the gain can be larger.
Does High Performance mode help?
Yes, typically a small but real gain, along with smoother, more consistent frame pacing since the CPU isn’t constantly ramping clock speeds up and down.
Can updating BIOS improve gaming performance?
Sometimes, particularly for memory stability and compatibility; it’s more often a stability and compatibility fix than a raw FPS boost, but both matter for a smooth experience.
Can chipset drivers fix a bottleneck?
They can, especially on AMD platforms where outdated chipset drivers are known to affect memory stability and core parking behavior, both of which impact CPU-bound performance.
Should GPU usage always be 99%?
In most single-player and GPU-intensive games, yes — that indicates you’re getting full value from your graphics card. The exception is competitive games where players intentionally lower settings to be CPU-bound at very high frame rates.
Can RAM speed cause bottlenecks?
Yes, particularly in CPU-bound and simulation-heavy games. Running below rated speed (XMP/EXPO disabled) or in single-channel mode can cost significant performance.
Does an SSD remove bottlenecks?
An SSD reduces stutter related to asset and texture streaming, and improves load times, but it doesn’t directly increase your CPU or GPU-bound FPS ceiling.
Can overheating create a bottleneck?
Yes — thermal throttling reduces clock speeds to protect the component, which functions exactly like a hardware bottleneck even though the underlying hardware is capable of more when properly cooled.
Should I upgrade my CPU or GPU first?
Upgrade whichever component is consistently maxed out while the other sits comparatively idle, based on the diagnosis steps earlier in this guide. Upgrading the already-underutilized component wastes money.
Conclusion
Bottlenecks sound like a hardware problem, but in practice, most of them are a software and settings problem wearing a hardware costume. Before you spend a dollar on new parts, work through the diagnosis steps to figure out whether your CPU or GPU is actually the limiting factor, then apply the free fixes that match — background app cleanup, XMP/EXPO, updated drivers, a proper power plan, and graphics settings tuned to your specific bottleneck.
For a lot of PCs, that combination alone recovers enough performance to make an upgrade unnecessary, at least for now. And when you do eventually upgrade, you’ll know exactly which component to spend on, instead of guessing and buying the wrong one.
Diagnose first. Optimize second. Upgrade only when the data tells you to.